Implement an OAuth 2.0 Server (Part 16)
Welcome to the sixteenth part of a series of posts where we will implement an OAuth 2 Server using AspNet.Security.OpenIdConnectServer.
Token Revocation
Token revocation is the process of invalidating already issued tokens. Because tokens are serialized with server data taken at a snapshot in time, there is no way for a token to know whether it’s been invalidated, except for when it comes to its expiration date. Further, there’s no given way for the server to know a token has been revoked either - at least, not without a backing datastore.
Thankfully, we’ve been using SQLite to store generated tokens, and our ValidationService already checks to see if a token is valid beyond just its expiration date.
Because token revocation is an action that the user should perform, rather than one Client Application should perform, we will implement it as a method on the user’s account management page.
That means we’ll be leaving the options.RevocationEndpointPath in startup untouched.
Note: We only revoke refresh tokens. It's too expensive to check whether an access token, which already has an inherently short lifetime, is valid or not on every request. Because refresh tokens are long lived, or in our case, infinitely so, we check them and not the others.
List Authorized Apps under /Manage
The first step is to show the user a list of the applications they’ve authorized on their behalf.
ViewModel
Under Models/ManageViewModels/, create a new one: AuthorizedAppsViewModel.cs:
public class AuthorizedAppsViewModel {
    public IList<OAuthClient> AuthorizedApps { get; set; }
}
It does nothing except except display a list of clients.
Manage Navigation (1/2)
Under Views/Manage/ManageNavPages.cs, add a few lines:
public static class ManageNavPages {
    public static string ActivePageKey => "ActivePage";

    public static string Index => "Index";

    public static string ChangePassword => "ChangePassword";

    public static string ExternalLogins => "ExternalLogins";

    public static string TwoFactorAuthentication => "TwoFactorAuthentication";

    public static string AuthorizedApps => "AuthorizedApps";

    public static string IndexNavClass(ViewContext viewContext) => PageNavClass(viewContext, Index);

    public static string ChangePasswordNavClass(ViewContext viewContext) => PageNavClass(viewContext, ChangePassword);

    public static string ExternalLoginsNavClass(ViewContext viewContext) => PageNavClass(viewContext, ExternalLogins);

    public static string TwoFactorAuthenticationNavClass(ViewContext viewContext) => PageNavClass(viewContext, TwoFactorAuthentication);

    public static string AuthorizedAppsNavClass(ViewContext viewContext) => PageNavClass(viewContext, AuthorizedApps);

    public static string PageNavClass(ViewContext viewContext, string page)
    {
        var activePage = viewContext.ViewData["ActivePage"] as string;
        return string.Equals(activePage, page, StringComparison.OrdinalIgnoreCase) ? "active" : null;
    }

    public static void AddActivePage(this ViewDataDictionary viewData, string activePage) => viewData[ActivePageKey] = activePage;
}Manage Navigation (2/2)
Under Views/Manage/_ManageNav.cshtml, add a reference to the strings we added above:
...

<ul class="nav nav-pills nav-stacked">
    <li class="@ManageNavPages.IndexNavClass(ViewContext)"><a asp-action="Index">Profile</a></li>
    <li class="@ManageNavPages.ChangePasswordNavClass(ViewContext)"><a asp-action="ChangePassword">Password</a></li>
    @if (hasExternalLogins)
    {
        <li class="@ManageNavPages.ExternalLoginsNavClass(ViewContext)"><a asp-action="ExternalLogins">External logins</a></li>
    }
    <li class="@ManageNavPages.TwoFactorAuthenticationNavClass(ViewContext)"><a asp-action="TwoFactorAuthentication">Two-factor authentication</a></li>
    <li class="@ManageNavPages.AuthorizedAppsNavClass(ViewContext)"><a asp-action="AuthorizedApps">Apps</a></li>
</ul>
Authorized Applications View
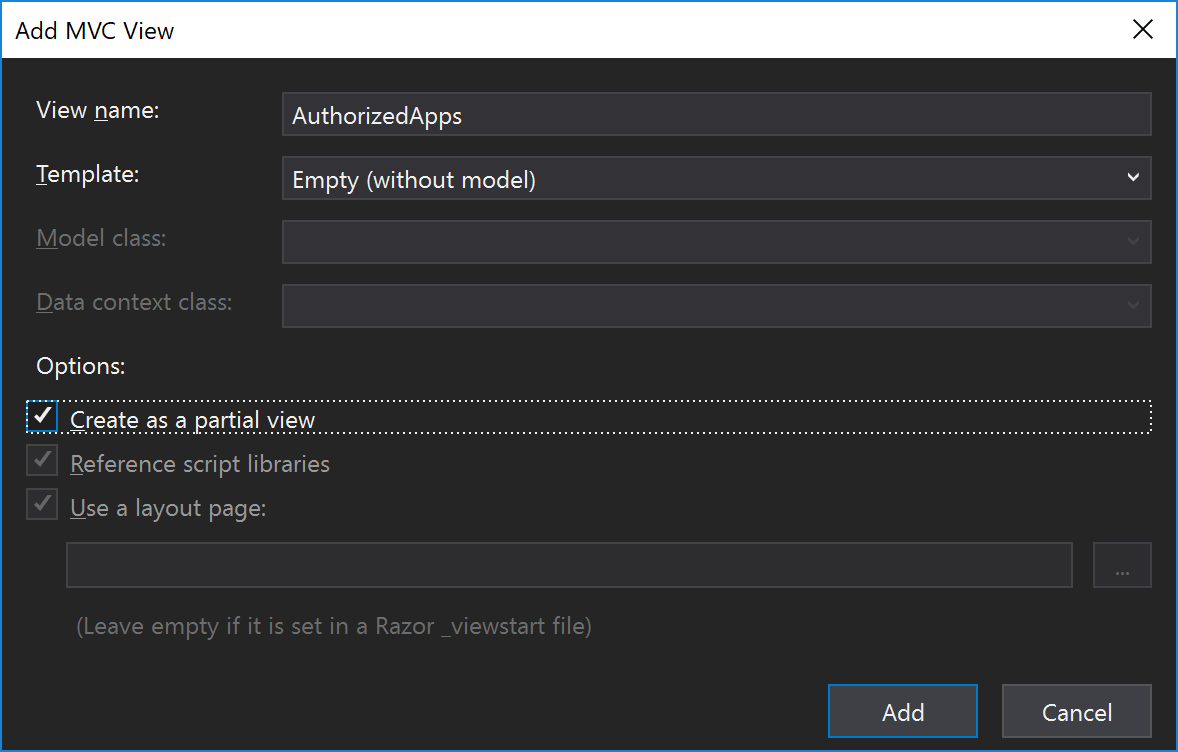
Under Views/Manage/ create a new view named AuthorizedApps - Check the box for Create as a Partial View. Do not include a model or a context, and kepe the template and Empty (without model).
@using OAuthTutorial.Models.OAuth
@model AuthorizedAppsViewModel
@{
    ViewData["Title"] = "Authorized Apps";
    ViewData.AddActivePage(ManageNavPages.AuthorizedApps);
}

<h4>@ViewData["Title"]</h4>
@if (Model.AuthorizedApps?.Count > 0) {
    <table class="table table-striped">
        <tbody>
            @foreach (OAuthClient client in Model.AuthorizedApps) {
                <tr>
                    <td>
                        <div>
                            <strong>@client.ClientName</strong>
                            <p>@client.ClientDescription</p>
                        </div>
                    </td>
                    <td>
                        <form asp-action="Revoke" asp-route-id="@client.ClientId" method="post">
                            <div>
                                <button type="submit" class="btn btn-default" title="Deauthorize this application and remove it from your list">Remove</button>
                            </div>
                        </form>
                    </td>
                </tr>
            }
        </tbody>
    </table>
} else {
    <div>
        You have no authorized applications! Go out and find some apps to play with.
    </div>

}
Nothing special - just a regular list. The only interesting thing is that we’ve included the client.ClientId as a route parameter of our button, which is going to POST to a method named Revoke.
Don’t worry about not having the validation scripts that are normally present in every other view: they’re taken care for us in the index page that will load this snippet.
Controller (1/3) - ApplicationDbContext
Open Controllers/ManageController.cs.
Because of the way the UserManager works, and because we’ll need to examine and manipulate the actual OAuthClients and Tokens, we need a handler to our ApplicationDbContext. Dependency-inject it into our constructor like normal:
[Authorize]
[Route("[controller]/[action]")]
public class ManageController : Controller
{
    private readonly UserManager<ApplicationUser> _userManager;
    private readonly SignInManager<ApplicationUser> _signInManager;
    private readonly IEmailSender _emailSender;
    private readonly ILogger _logger;
    private readonly UrlEncoder _urlEncoder;
    private readonly ApplicationDbContext _context;

    private const string AuthenticatorUriFormat = "otpauth://totp/{0}:{1}?secret={2}&issuer={0}&digits=6";
    private const string RecoveryCodesKey = nameof(RecoveryCodesKey);

    public ManageController(
        UserManager<ApplicationUser> userManager,
        SignInManager<ApplicationUser> signInManager,
        IEmailSender emailSender,
        ILogger<ManageController> logger,
        UrlEncoder urlEncoder,
        ApplicationDbContext context)
    {
        _userManager = userManager;
        _signInManager = signInManager;
        _emailSender = emailSender;
        _logger = logger;
        _urlEncoder = urlEncoder;
        _context = context;
    }

    ...
}
Controller (2/3) - GET
Near the bottom, add GET support for our new page:
[HttpGet]
public async Task<IActionResult> AuthorizedApps() {
    string uid = _userManager.GetUserId(User);
    if (String.IsNullOrWhiteSpace(uid)) {
        throw new ApplicationException($"Unable to load user with ID '{uid}'.");
    }

    IEnumerable<Token> userstokens = (await _context.Users.Include(x => x.UserClientTokens).FirstOrDefaultAsync(x => x.Id == uid))?.UserClientTokens;
    if(userstokens == null) {
        throw new ApplicationException($"Unable to load user apps for user ID '{uid}'.");
    }

    IList<OAuthClient> items = _context.ClientApplications.Include(x => x.UserApplicationTokens).Where(x => x.UserApplicationTokens.Any(y => userstokens.Contains(y))).ToList();
    AuthorizedAppsViewModel aavm = new AuthorizedAppsViewModel() {
        AuthorizedApps = items,
    };
    return View(aavm);
}
For each token that the user has associated to them, we get the OAuthClient that issued it, then return that list to the user.
Controller (3/3) - POST
Beneath the GET, add one final method, the post for our View:
[HttpPost, ActionName("revoke/{id}")]
[ValidateAntiForgeryToken]
public async Task<IActionResult> Revoke(string id) {
    string uid = _userManager.GetUserId(User);
    ApplicationUser user = await _context.Users.Include(x => x.UserClientTokens).FirstOrDefaultAsync(x => x.Id == uid);
    if (user == null || String.IsNullOrWhiteSpace(uid)) {
        throw new ApplicationException($"Unable to load user with ID '{uid}'.");
    }
    OAuthClient client = await _context.ClientApplications.Include(x => x.UserApplicationTokens).FirstOrDefaultAsync(x => x.ClientId == id);
    if (String.IsNullOrWhiteSpace(id) || client == null) {
        throw new ApplicationException($"Supplied client id was invalid");
    }

    IList<Token> tokens = client.UserApplicationTokens.Intersect(client.UserApplicationTokens).ToList();
    foreach(Token t in tokens) {
        _context.Tokens.Remove(t);
        client.UserApplicationTokens.Remove(t);
        user.UserClientTokens.Remove(t);
    }
    _context.ClientApplications.Update(client);
    _context.Users.Update(user);
    await _context.SaveChangesAsync();


    return RedirectToAction(nameof(AuthorizedApps));
}
We compare tokens from our user based on the client id they submitted to us with the POST /revoke/{id} request, and for each matching token returned from the database, we remove it from the Tokens table, we remove its reference from the OAuthClient entry, and we remove it from our User. Since everything is ON DELETE CASCADE just removing it from the Tokens table should be enough, but we can afford to be thorough so we will.
Finally we update our tracked items, save our changes, and then reload the page.
Testing Revocation
Start the server and if you haven’t already, create a user, create a client, and issue a token from that client. If you haven’t deleted your database from the previous section, this is already done for you.
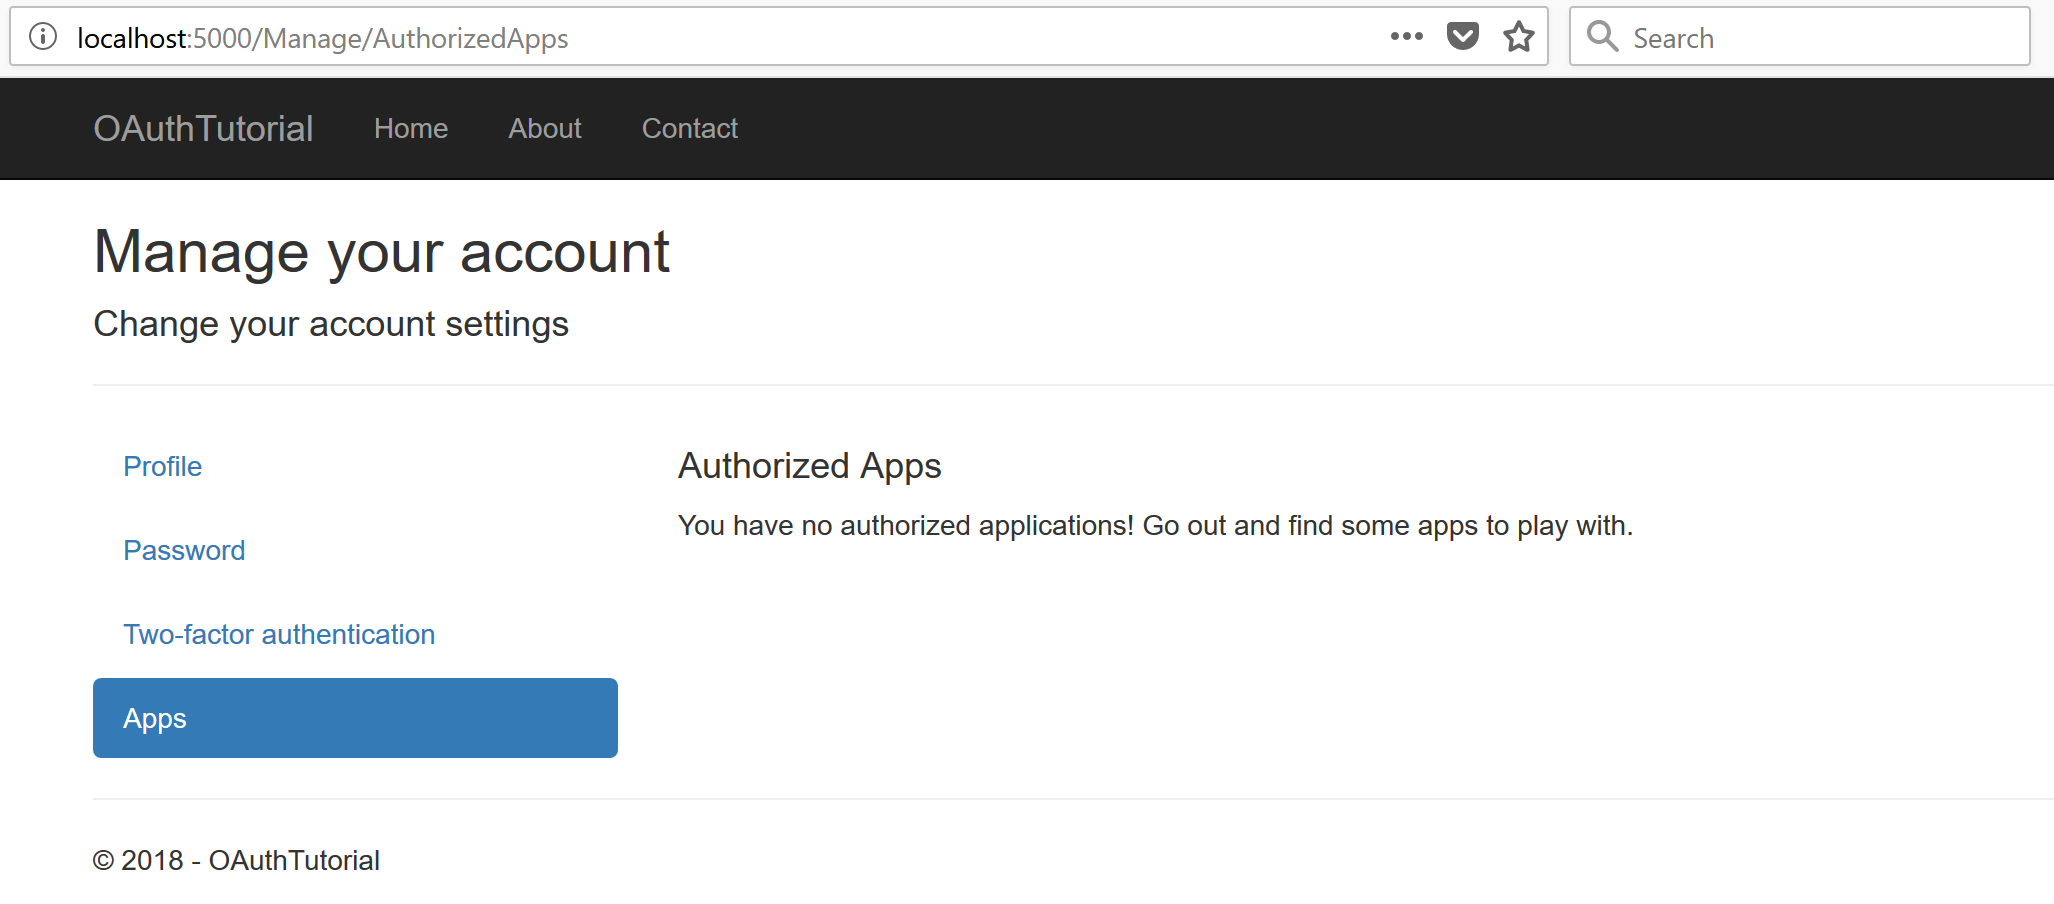
Navigate to http://localhost:5000/manage and check out the apps you’ve authorized:
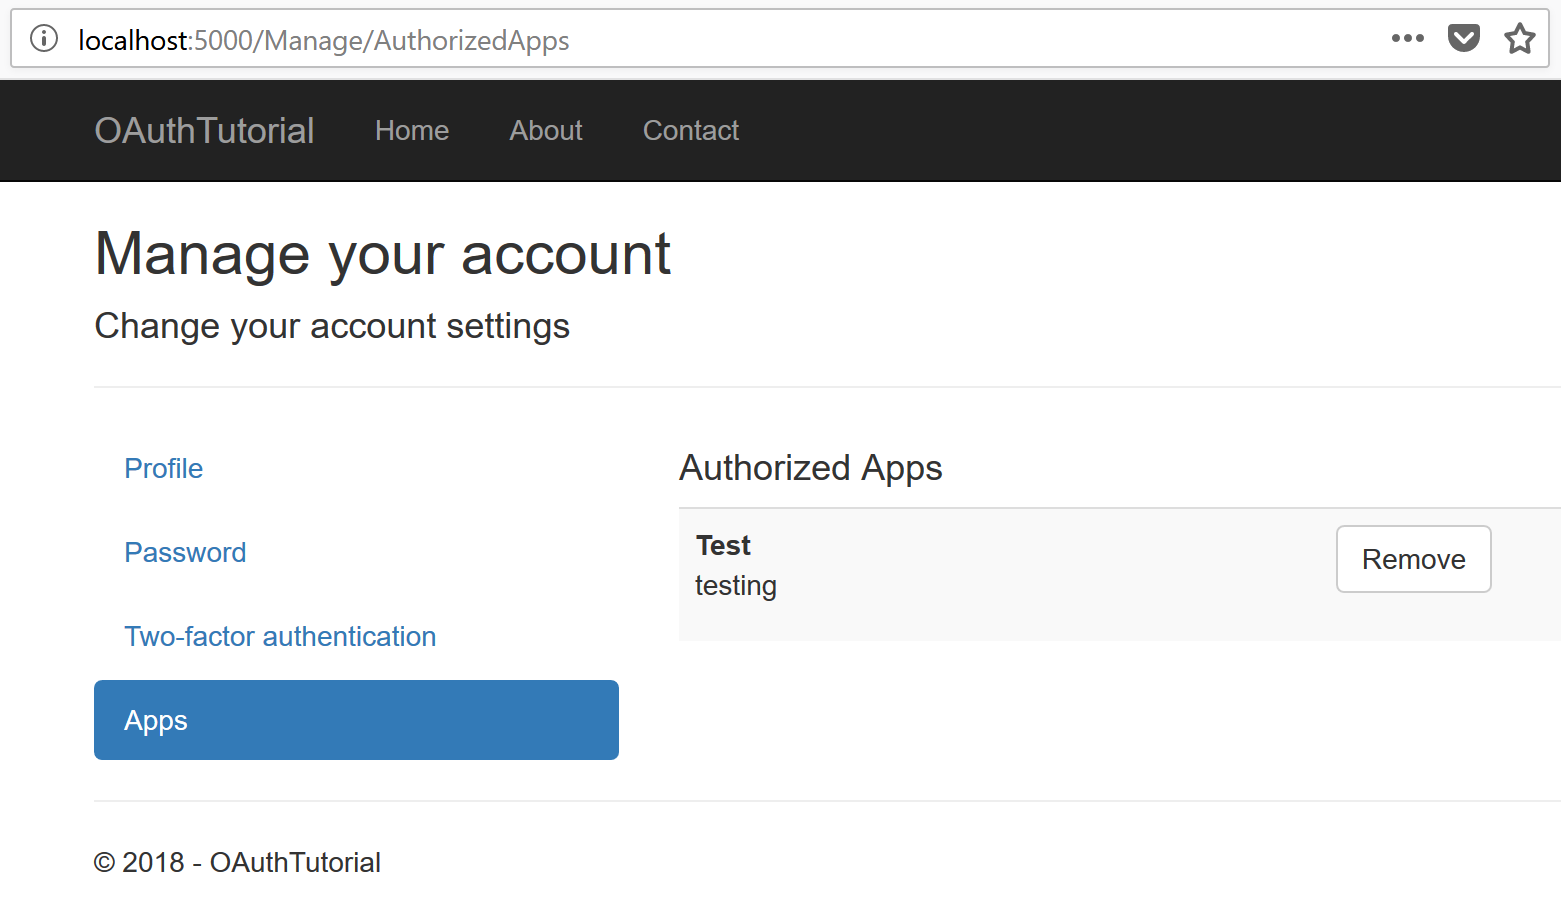
Click the Remove button, and you the page should refresh, but be empty this time:
Revoking Access Tokens
We don’t revoke access tokens because it would be expensive to check the validity against the database for each request, but if you want to do so, it wouldn’t be difficult to adjust our design to account for that.
We already store all currently issued access tokens and our Revoke method already deletes all issued tokens to a user/client combo, so the only things to do would be to add a CheckAccessTokenStillValid to the ValidationService class and call it in the [RateLimit] attribute.
Moving On
The demo of this project to this point can be found here on GitHub.
In the next section, we’ll add Rate Limiting to our application.
Posts in this series
- Implement an OAuth 2.0 Server (Part 19)
- Implement an OAuth 2.0 Server (Part 18)
- Implement an OAuth 2.0 Server (Part 17)
- Implement an OAuth 2.0 Server (Part 16)
- Implement an OAuth 2.0 Server (Part 15)
- Implement an OAuth 2.0 Server (Part 14)
- Implement an OAuth 2.0 Server (Part 13)
- Implement an OAuth 2.0 Server (Part 12)
- Implement an OAuth 2.0 Server (Part 11)
- Implement an OAuth 2.0 Server (Part 10)
- Implement an OAuth 2.0 Server (Part 09)
- Implement an OAuth 2.0 Server (Part 08)
- Implement an OAuth 2.0 Server (Part 07)
- Implement an OAuth 2.0 Server (Part 06)
- Implement an OAuth 2.0 Server (Part 05)
- Implement an OAuth 2.0 Server (Part 04)
- Implement an OAuth 2.0 Server (Part 03)
- Implement an OAuth 2.0 Server (Part 02)
- Implement an OAuth 2.0 Server (Part 01)